How to create new map (mission, scenario)
Mission vs Scenario vs Map
First let's explain these 3 different concepts.
Mission
- Mission is basic unit of Nebuchadnezzar.
- It connects map and objectives together.
- Several mission together can form campaign.
- Player always play missions.
Scenario
- Scenario is just a special subset of mission.
- It's a mission which is not part of any campaign.
- Player can play any scenario without any limitation, because all scenarios are unlocked.
Map
- Map is data file containg information about specific map.
- Stuff like surface layout, buildings etc.
Create mission atom
To create new mission you have to create an atom for it first.
- In your mode create
deffolder. It will contains all def files. - In that folder create
mission.luafile.- The name of the file is important because the type of atom is based on the def file name.
- And now let's add some content.
nature_buildings = {
    'base::build.palm.1',
    'base::build.palm.2',
    'base::build.palm.3',
    'base::build.palm.4',
    'base::build.bush.1',
    'base::build.bush.2',
    'base::build.bush.3',
    'base::build.bush.4',
    'base::build.palm.bush.1',
    'base::build.palm.bush.2',
    'base::build.palm.bush.3',
    'base::build.palm.bush.4',
    'base::build.fish.1',
}
- First of all, we will prepare some general variable, which we can use in multiple mission atoms.
- Beause it's always better to have shared data in some variable.
- The variable
nature_buildingsnow contains all nature buildings from thebasemod. - Notice the
base::part when referencing atoms. You have to use it because you are referencing atoms from other mod.
irrig_buildings = {
    'base::build.irrig.canal',
    'base::build.irrig.pump',
    'base::build.irrig.bridge.dirty',
    'base::build.irrig.bridge.stone',
}
- In the same way we create variable containing all irrigation buildings from the
basemod.
mission_base = {
    base_mods = {"base"},
    first_residents_event = 'base::event.first_residents',
    leaving_residents_event = 'base::event.leaving_residents',
    returning_residents_event = 'base::event.returning_residents',
    no_path_residents_event = 'base::event.no_path_residents',
}
- Here we prepare variable containing data which are usable in all mission.
- We use events from the base mod.
- As well as
base_modsproperty which determines from which mods the game should take available terrain data.
atom ('mission.my_first_mission', mission_base,
{
    description = 'description.my_first_mission',
    intro_event = 'event.intro.my_first_mission',
    money_events = {},

    allowed_buildings = ac(
        nature_buildings, ac(
        irrig_buildings, {
        'base::build.road.dirty',
        'base::build.shop.bread',
        'base::build.farm.plant.1',
        'base::build.warehouse.1',
        'base::build.house.lower.1',
    }),

    allowed_monuments = {},
    allowed_templates = {},

    map = 'map.my_first_mission',
    prestige = 'prestige.my_first_mission',
    requests = {},
    demands = {},

    target_population = 300,
    target_prestige = 10,
    target_level_atoms = {'base::level.house.lower.1'},
    target_level_counts = {12},
})
- And finaly we can see our new mission atom.
- Notice usage of function
acwhen defining allowed buildings.- This is helper function avilable in all def files and it can be use for arrays concatenation.
- Because not all referenced atoms are from the
basebase, we will of course have to create them before starting to work with this mission.- Look at corresponding atoms in base for inspiration.
Create map file
When we have valid mission atom, we can start to create the map itself for the mission.
- To create new map use command
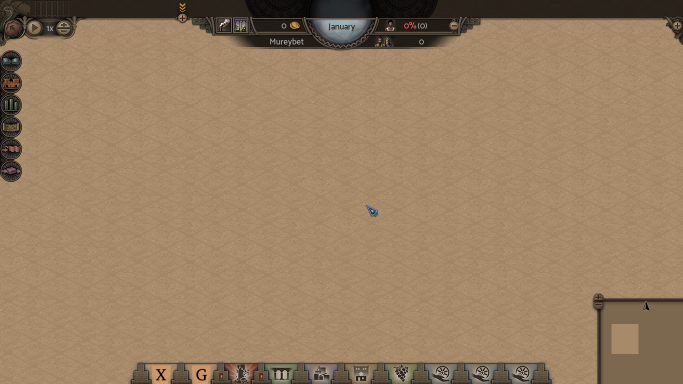
new_map [mission atom name] [size x] [size y] - After that the game will load the mission with empty map.
- It should look like this:
Map surface
The first thing you should fill the map with desired surface.

- To change surface use the editor only menu with capital G.
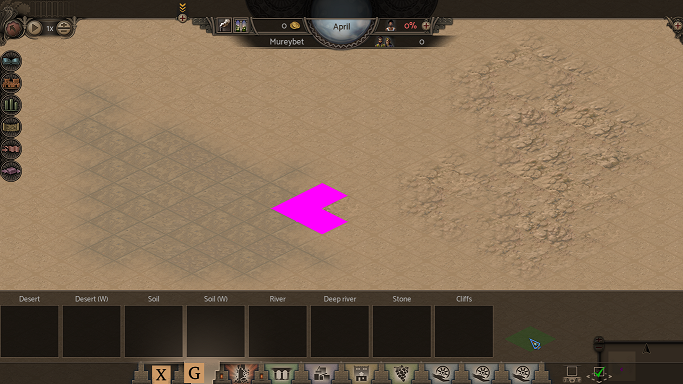
- It provides all avilable surface types based on mission property
base_mods.- Actualy atoms with surface type are called
gridandsurfaceatoms then represent transition and graphical representation of surface types.
- Actualy atoms with surface type are called
- To apply it, simply select required type and then click on the desired place in the map.
- Notice the pink tiles.
- They are used on tiles for which are not defined transition atoms.
- You can also use "flatfill" functionaly mapped on the key
T.
Map ends
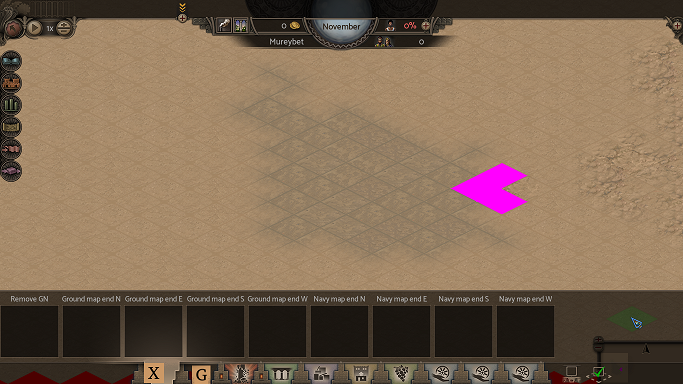
Map ends are special places in the maps with special functionality.

Ground map ends
Ground maps end are tiles from wich new settlers are coming to the city.
