How to create new map (mission, scenario)
Jump to navigation
Jump to search
Mission vs Scenario vs Map[edit]
First let's explain these 3 different concepts.
Mission[edit]
- Mission is basic unit of Nebuchadnezzar.
- It connects map and objectives together.
- Several mission together can form campaign.
- Player always play missions.
Scenario[edit]
- Scenario is just a special subset of mission.
- It's a mission which is not part of any campaign.
- Player can play any scenario without any limitation, because all scenarios are unlocked.
Map[edit]
- Map is data file containg information about specific map.
- Stuff like surface layout, buildings etc.
Create mission atom[edit]
To create new mission you have to create an atom for it first.
- In your mode create
deffolder. It will contains all def files. - In that folder create
mission.luafile.- The name of the file is important because the type of atom is based on the def file name.
- And now let's add some content.
Nature buildings variable[edit]
nature_buildings = {
    'base::build.palm.1',
    'base::build.palm.2',
    'base::build.palm.3',
    'base::build.palm.4',
    'base::build.bush.1',
    'base::build.bush.2',
    'base::build.bush.3',
    'base::build.bush.4',
    'base::build.palm.bush.1',
    'base::build.palm.bush.2',
    'base::build.palm.bush.3',
    'base::build.palm.bush.4',
    'base::build.fish.1',
}
- First of all, we will prepare some general variable, which we can use in multiple mission atoms.
- Beause it's always better to have shared data in some variable.
- The variable
nature_buildingsnow contains all nature buildings from thebasemod. - Notice the
base::part when referencing atoms. You have to use it because you are referencing atoms from other mod.
Irrigation buildings variable[edit]
irrig_buildings = {
    'base::build.irrig.canal',
    'base::build.irrig.pump',
    'base::build.irrig.bridge.dirty',
    'base::build.irrig.bridge.stone',
}
- In the same way we create variable containing all irrigation buildings from the
basemod.
Mission parent[edit]
mission_base = {
    base_mods = {"base"},
    first_residents_event = 'base::event.first_residents',
    leaving_residents_event = 'base::event.leaving_residents',
    returning_residents_event = 'base::event.returning_residents',
    no_path_residents_event = 'base::event.no_path_residents',
}
- Here we prepare variable containing data which are usable in all mission.
- We use events from the base mod.
- As well as
base_modsproperty which determines from which mods the game should take available terrain data.
Mission definition[edit]
atom ('mission.my_first_mission', mission_base,
{
	description = 'base::mission.description.nz.11',
	intro_event = 'base::event.intro.nz.11',
	money_events = {'base::event.money.nz.11', 'base::event.money.nothing'},

	allowed_buildings = ac(
		nature_buildings, ac(
		irrig_buildings, {
		'base::build.road.dirty',
		'base::build.road.stone',
		'base::build.bridge',
		'base::build.mine.clay',
		'base::build.mine.fish',
		'base::build.shop.bread',
		'base::build.shop.ceramic',
		'base::build.shop.brick',
		'base::build.shop.copper_jewels',
		'base::build.shop.beer',
		'base::build.shop.tablet',
		'base::build.shop.ceremony',
		'base::build.shop.meat',
		'base::build.shop.furniture',
		'base::build.shop.seal',
		'base::build.shop.gold_jewels',
		'base::build.shop.fabric',
		'base::build.shop.cloth',
		'base::build.service.water',
		'base::build.service.priest',
		'base::build.service.administration',
		'base::build.service.library',
		'base::build.service.lawyer',
		'base::build.market.basic.7',
		'base::build.market.mid.11',
		'base::build.market.luxury.10',
		'base::build.farm.plant.11',
		'base::build.farm.animal.9',
		'base::build.warehouse.11',
		'base::build.house.lower.4',
		'base::build.house.middle.5',
		'base::build.house.upper.3',
		'base::build.caravanserai.11',
		'base::build.mn_warehouse',
		'base::build.port.small',
		'base::build.port.big',
		'base::build.decor.stele',
		'base::build.decor.obelisk',
		'base::build.decor.statue',
		'base::build.decor.grass.small',
		'base::build.decor.garden.small.1',
		'base::build.decor.garden.small.2',
		'base::build.decor.garden.small.3',
		'base::build.decor.garden.small.color.1',
		'base::build.decor.garden.small.color.2',
		'base::build.decor.garden.small.color.3',
		'base::build.decor.garden.small.color.4',
		'base::build.decor.garden.small.fountain.1',
		'base::build.decor.garden.small.fountain.2',
		'base::build.decor.garden.small.fountain.3',
		'base::build.decor.garden.big.1',
		'base::build.decor.garden.big.2',
		'base::build.road.decorative.1',
		'base::build.road.decorative.2',
		'base::build.road.decorative.3',
	})),
	allowed_monuments = {
		'base::mn.temple.11',
		'base::mn.palace.11',
	},
	allowed_templates = {
		'base::mn_template.temple.11',
		'base::mn_template.palace.11',
	},

	map = 'base::map.nz.11',
	prestige = 'base::prestige.nz.11',
	requests = {'base::request.nz.11.a', 'base::request.nz.11.b', 'base::request.nz.11.c'},
	demands = {},

	target_population = 24000,
	target_prestige = 1440,
	target_level_atoms = {
		'base::level.house.middle.5',
		'base::level.house.upper.3',
	},
	target_level_counts = {
		64,
		11,
	},
	target_monument_atoms = {
		'base::mn_category.temple.11',
		'base::mn_category.palace.11',
	},
	target_monument_counts = {
		1,
		1,
	},
})
- And finaly we can see our new mission atom.
- Notice usage of function
acwhen defining allowed buildings.- This is helper function avilable in all def files and it can be use for arrays concatenation.
- This specific mission definition is just a copied definition of 11th mission from the base mod, where we added
base::to referenced atom names, so they properly reference base mod.- Look at corresponding atoms in the base mod for inspiration for creation of your own.
Create map file[edit]
When we have valid mission atom, we can start to create the map itself for the mission.
- To create new map use command
new_map [mission atom name] [size x] [size y]- To create new map for the mission from the example it could be:
new_map [your mod name]::mission.my_first_mission 30 60
- To create new map for the mission from the example it could be:
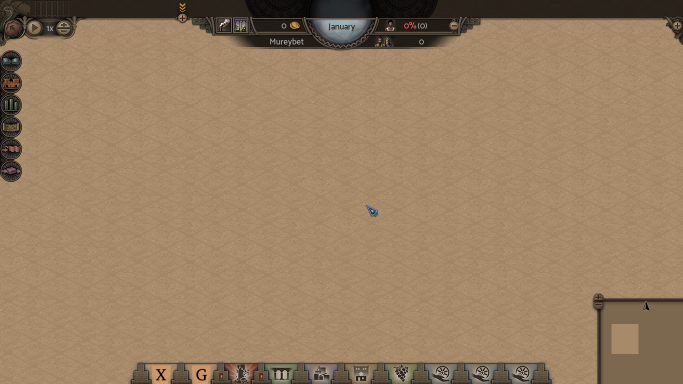
- After that the game will load the mission with empty map.
- It should look like this:
Map surface[edit]
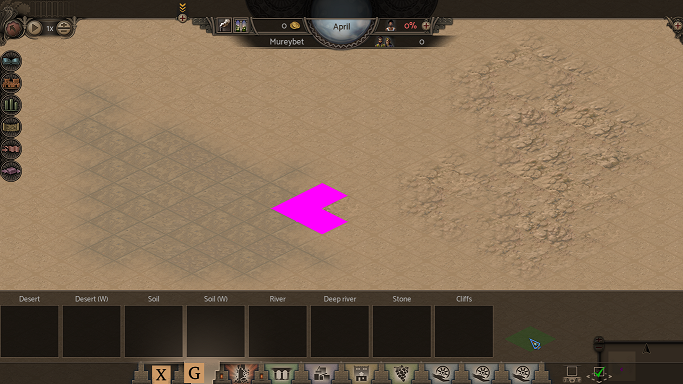
As the first step you should fill the map with desired surface.

- To change surface use the editor only menu with capital G.
- It provides all avilable surface types based on mission property
base_mods.- Actualy atoms with surface types are called
gridandsurfaceatoms then represent transition and graphical representation of surface types.
- Actualy atoms with surface types are called
- To apply it, simply select required type and then click on the desired place in the map.
- Notice the pink tiles.
- They are used on tiles for which there are not defined transition surface atoms.
- You can also use "flood fill" functionaly mapped on the key
Tby default.
Map ends[edit]
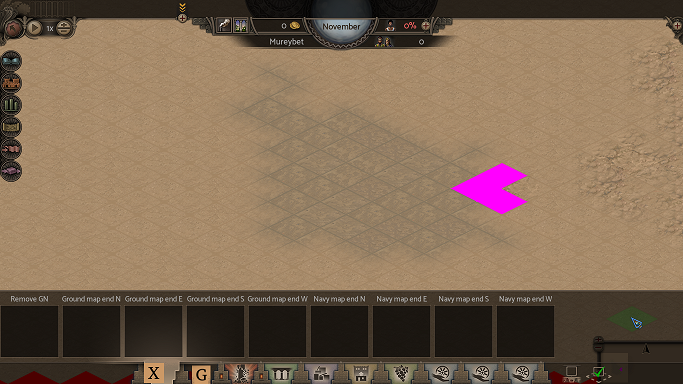
Map ends are special places in the maps with special functionality.
- To set up maps end use the editor only menu with capital X.
Ground map ends[edit]
Ground maps end are tiles from which new settlers are coming to the city.
[edit]
Navy ends are tiles from which trade ships are coming to trade.
Saving map[edit]
To save the map use the command save_map [empty or city]
- Because the game knows which mission you are editing, the map file is saved automatically to the correct location.
emptyvscity- Each mission can actually support two maps simultaneously.
- empty should be map without any advanced buildings.
- city map can contains any city strctures and should serves as start with partialy build city - history start.
Useful console commands[edit]
edit_map [mission atom name] [empty or city]- Open map in editor.
resize_map [diff x] [diff y]- Resize currently edited map.
- Preserves surface and buildings.
preview_map [mission atom name] [empty or city]- Run mission in the standart mode.
- It's the same like starting mission from mission menu.
c_add_money [money]- Add money.

